Protecting Your Home: The Essentials of Roof Repair
Looking for quick asphalt shingle roof repair guidance?
| When to DIY | When to Call a Pro |
|---|---|
| 1-2 damaged shingles | Multiple damaged areas |
| Minor cracks or curling | Sagging roof sections |
| No interior water damage | Visible leaks or water stains |
| Comfortable with heights | Steep roof (>6/12 pitch) |
| Have basic tools & materials | Roof older than 15-20 years |
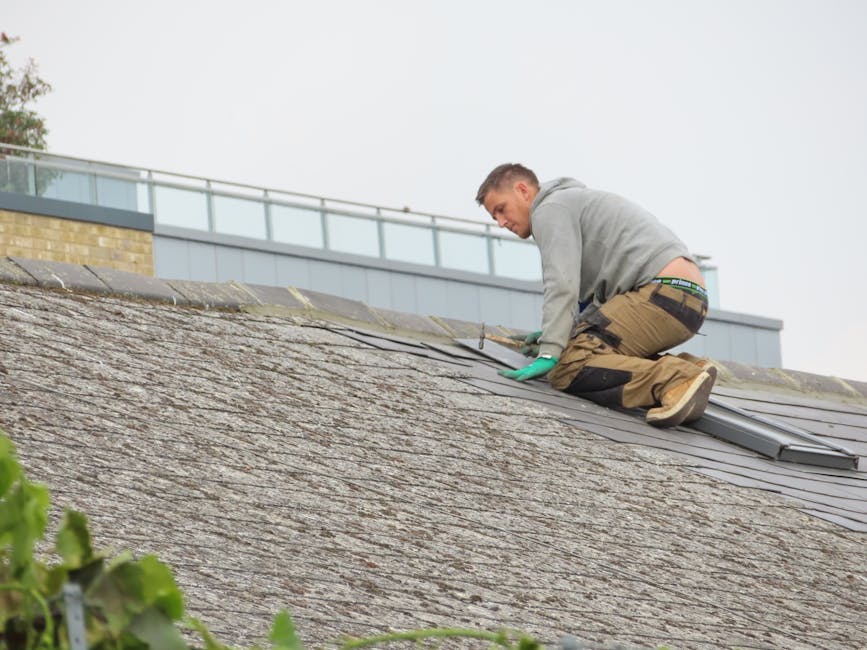
Asphalt shingle roof repair is one of the most common home maintenance tasks homeowners face. Your roof is your home’s first line of defense against Central Texas weather, from scorching summer heat to unexpected hailstorms. When shingles become damaged, addressing the issue quickly can prevent costly water damage and extend your roof’s lifespan.
A typical asphalt shingle roof can last between 15-30 years, but this lifespan depends heavily on proper maintenance and timely repairs. Missing, curling, or cracked shingles aren’t just cosmetic problems – they’re warning signs that your home’s protection system is compromised.
Keeping your roof in good shape doesn’t just protect your home; it also protects your wallet. While a complete roof replacement can cost between $5,000 to $12,000, minor DIY repairs might only run a few hundred dollars in materials. Even professional repairs typically range from $300 to $1,500 – significantly less than a full replacement.
I’m Matthew Runyon, President of EMC Remodeling & Roofing with over 15 years of experience specializing in asphalt shingle roof repair throughout Central Texas. My team and I have seen how proper roof maintenance can save homeowners thousands in preventable damage.

Why Asphalt Shingle Roofs Fail & How to Spot Trouble
Your roof works hard every day to protect your Central Texas home, but even the toughest asphalt shingles eventually show signs of wear and tear. Understanding what damages your roof is the first step toward effective asphalt shingle roof repair.
When I inspect roofs around Temple and Killeen, I often find homeowners are surprised by how their shingles deteriorate. The Texas sun beats down relentlessly, while occasional storms add their own brand of punishment. Your shingles are constantly expanding and contracting through thermal cycling – heating up during our scorching summer days and cooling down at night.
You might notice granule loss first – those little dark, gravelly bits that wash into your gutters after a rain. When those protective granules disappear, you’ll see bald spots that expose the vulnerable asphalt beneath. Over time, the edges of your shingles may start curling upward or even form a cup-like shape, often indicating age or poor ventilation in your attic.
“Most homeowners don’t realize their roof is damaged until they spot water stains on their ceiling,” I tell my clients. “By then, the damage has already progressed significantly.”
Cracking or splitting happens when shingles expand and contract over time, or when they’re hit by hail or falling branches. After a strong Texas windstorm, you might find lifted tabs or completely torn-off shingles scattered in your yard. And those little dark dimples after a hailstorm? Those are hail bruises – areas where protective granules have been knocked away.
Inside your home, water stains on ceilings or walls and damp spots in your attic after rain are clear warning signs that your roof’s protective barrier has been compromised.
Early-Warning Signs Homeowners Miss
Before major leaks develop, your roof typically sends subtle distress signals that are easy to overlook if you’re not paying attention.
Those bald spots where granules have worn away might seem minor, but they’re actually exposing your shingles to accelerated deterioration. Dark streaks or moss growth, especially on north-facing or shaded sections of your roof, indicate moisture retention that can damage shingles over time.
Check around chimneys, vents, and roof valleys for loose flashing – those metal pieces designed to create watertight seals at roof transitions. When walking on your roof (safely, of course), be alert for any soft spots that might indicate the decking beneath is rotting. Visible nails that have worked their way up through shingles and any waviness in what should be flat roof planes are also signs of trouble.
I recommend grabbing a pair of binoculars and inspecting your roof from the ground twice yearly – especially after major storms. This simple habit can catch problems early, when asphalt shingle roof repair is still a minor job.
Storm & Seasonal Stress Tests
Living in Central Texas means your roof faces different challenges as the seasons change:
During spring, those sudden hailstorms can create impact damage that might not be immediately visible but compromises your shingles’ integrity. Come summer, our intense UV exposure and heat (often exceeding 100°F) accelerate aging and can make shingles brittle and prone to damage.
When fall arrives, those beautiful leaves can become problematic as they collect in gutters, potentially leading to water backup under your shingles. And while rare in our region, winter occasionally brings freezing temperatures that can lead to ice dams, especially on poorly ventilated roofs.
Ice dams form when heat escapes from your home, melting snow on the roof which then refreezes at the eaves. This can force water under your shingles, causing leaks and damage. Proper attic insulation and ventilation are your best defense. For more detailed guidance on preventing ice dams, check out this helpful resource from the National Weather Service: prevent ice dams tips.
By understanding these seasonal challenges, you’ll be better equipped to protect your roof through preventative maintenance rather than reactive repairs.
Gear Up: Tools, Materials & Safety First
Ready to tackle that asphalt shingle roof repair? Let’s make sure you’re properly equipped before you climb up there. Having the right tools not only makes the job easier but also helps ensure your safety.
Must-Have DIY Toolkit
Think of your roof repair toolkit as your trusty sidekick on this home improvement trip. For basic repairs, you’ll want a sturdy ladder with a stabilizer attachment to protect your gutters from damage. A flat pry bar is essential for gently lifting shingles without cracking them—something I learned the hard way on my first DIY repair!
You’ll also need standard 1¼” roofing nails, a reliable hammer (or nail gun for larger jobs), and a utility knife with a hook blade for clean shingle cuts. Don’t forget to grab matching replacement shingles, roofing cement, and a caulking gun for proper sealing.
“One tool homeowners often forget is a putty knife,” I tell our Belton customers. “It’s perfect for applying roofing cement under curled shingles without making a mess.”
A chalk line will help keep everything aligned, and a heavy brick comes in handy for holding down curled shingles while adhesive sets. My personal pro tip? Bring along some rare-earth magnets—they’re fantastic for pinpointing the exact location of leaks from inside your attic when you’re trying to match interior water damage to exterior problems.
Keep everything organized in a tool belt to prevent dangerous trips back and forth on the ladder. Your future self will thank you!

Stay Safe Up There
I can’t stress this enough—roof work can be dangerous. Your safety should always come first. Here in Central Texas, we follow what I call the “dry-day rule”—only tackle roof repairs when it’s dry with mild temperatures and minimal wind.
If your roof is steeper than a 6/12 pitch (that’s 6 inches of rise for every 12 inches of run), please leave it to professionals like us. That slope can be deceptively treacherous, especially for DIYers.
Always position your ladder so it extends at least 3 feet above the roof edge and rests on solid, level ground. And never work alone—the buddy system isn’t just for swimming! Have someone on the ground to stabilize the ladder and assist if needed.
Proper safety gear is non-negotiable. This includes non-slip boots (regular sneakers are an accident waiting to happen), heavy-duty gloves to protect your hands, a safety harness attached to a secure anchor point, and safety glasses to shield your eyes from debris.
For our friends in Harker Heights and Killeen, I especially emphasize staying hydrated during summer repairs. Roof temperatures can soar above 150°F, and heat exhaustion can sneak up on you fast.
Always check the weather forecast before starting work. Nothing complicates a repair like an unexpected shower!
Remember: No roof repair is worth risking your safety. If you’re uncomfortable with heights or the scope of the job seems overwhelming, please give us a call. We’re always happy to help with a professional assessment and give you peace of mind.
Asphalt Shingle Roof Repair Made Easy: Step-by-Step Guide
Ready to tackle that asphalt shingle roof repair yourself? I’ve helped countless Central Texas homeowners through this process, and I promise it’s more manageable than you might think. Whether you’re dealing with traditional 3-tab shingles or the more dimensional architectural variety, the fundamentals remain pretty consistent.
Quick-Glance Checklist for Asphalt Shingle Roof Repair
Let me walk you through the basics first. Think of this as your “roof repair at a glance” guide:
- Carefully lift the tabs of shingles above the damaged one
- Remove nails securing the damaged shingle with your pry bar
- Slide out the damaged shingle
- Slide in the new shingle, aligning it with adjacent ones
- Nail the new shingle in place (low on the shingle where the next course will cover the nail heads)
- Apply roofing cement under the tabs of shingles above
- Press tabs down firmly and apply slight pressure
- Sprinkle saved granules over any exposed sealant for a better color match
I always tell our Salado customers that patience is truly the secret ingredient here. Rush through any of these steps, and you’ll likely end up with broken shingles and a bigger project on your hands.
Replace a Missing or Torn Shingle
When a shingle needs to be completely replaced, take your time with each step:
First, thoroughly inspect the area to make sure you’re addressing all damaged shingles. Using your pry bar, gently lift the edges of the overlapping shingles. You’ll find the nails you need to remove just under the edge of the shingle above the damaged one.
Once those nails are out, you can carefully slide out the damaged shingle. This is where many DIYers get into trouble—yanking too hard can tear adjacent shingles, so easy does it! Take a moment to check the underlayment for any damage. If you spot tears, place a small piece of 30# felt as a patch.
Now slide your new shingle into position, making sure it lines up perfectly with surrounding shingles. Nail it in place with four roofing nails, positioned just below where the next shingle will overlap. Finish by applying a small dab of roofing cement under each tab and pressing down firmly to ensure good adhesion.

Here’s a little Temple trick I share with local homeowners: warm new shingles in the sun before installation. This makes them more pliable and significantly less likely to crack as you work with them.
Patch Curling, Cracked or Blistered Tabs (No Full Replacement)
Not every damaged shingle needs replacement—sometimes a good patch job will do:
For those curled edges, clean underneath the curl first, then apply a generous amount of roofing cement. Press the shingle down firmly and place a brick on top for about 24 hours while the adhesive sets. This simple fix can add years to your shingle’s life.
When dealing with cracked shingles, apply roofing cement under the crack, press the surfaces together, then add another layer of cement over the crack. While it’s still wet, sprinkle matching granules over the cement. This not only seals the crack but camouflages your repair work.
For blistered shingles, my advice is simple: if the blister hasn’t broken, leave it alone. If it has ruptured, apply roofing cement to the area to prevent moisture intrusion.
I often recommend the heat-soften method to our Killeen customers dealing with curled shingles. On a warm Texas day (and we have plenty!), the sun naturally makes shingles more pliable, making it easier to flatten and seal them without breaking.
Color-Match Secrets for Asphalt Shingle Roof Repair
A challenge in asphalt shingle roof repair is matching new shingles to weathered ones. Here’s how the pros do it:
Keep spare shingles from your original installation if possible. Store them in a dry, flat location—they’re worth their weight in gold for repairs. I also recommend collecting fallen granules from your gutters during cleaning and saving them for camouflaging future repairs.
If you don’t have matching shingles, try the “hidden donor” approach. Remove intact shingles from less visible areas (behind chimneys or on the north side), use these for repairs on visible sections, then install new shingles in the less visible areas. It’s a bit more work, but the aesthetic payoff is worth it.
For homes in Belton and Temple struggling with algae staining, installing copper strips near the ridge can prevent new stains and gradually eliminate existing ones as rainwater washes copper particles down the roof.
When to Patch, Replace or Call It Quits
Knowing when to repair versus replace is crucial for maintaining your roof’s integrity:
If you’re looking at less than 20% damaged shingles, targeted repairs are typically your best bet. But when you’re seeing widespread granule loss or multiple leaks in different areas, it’s time to consider a more comprehensive solution.
For roofs older than 20 years, replacement is usually more cost-effective than continuing to patch. Sagging deck or structural issues require immediate professional assessment—these aren’t DIY territory. And if your roof already has two layers of shingles, building codes will require a complete tear-off for any new work.
I often tell our Harker Heights homeowners that if their roof is approaching 80% of its expected lifespan and needs significant repairs, replacement is typically the more economical long-term decision. Sometimes the smartest investment is starting fresh with a new roof that will protect your home for decades to come.
DIY vs Professional Repairs: Cost, Codes & Quality Control
Deciding whether to tackle asphalt shingle roof repair yourself or call in the pros is a bit like choosing between cooking dinner or ordering takeout – both get the job done, but there are tradeoffs in time, cost, and quality.
Let’s break down what you’re really looking at cost-wise:
Budget Breakdown & Hidden Costs
If you’re handy and comfortable on a ladder, DIY repairs might seem attractive. A bundle of shingles runs about $40-$45 (covering roughly 33 square feet), roofing cement costs $5-$10 per tube, and nails about $3-$5 per pound. Sounds affordable, right?
But don’t forget those “surprise expenses” that tend to pop up. If you don’t already own specialized tools, that’s another $50-$150. Proper safety equipment (which you absolutely shouldn’t skip) adds $100-$300. Then there’s the dump fees for old materials – anywhere from $25-$100 depending on your local rates.
“I had a customer in Temple who tried to save money on a simple repair,” I often tell homeowners. “He ended up making three separate trips to the hardware store, rented a ladder he didn’t know he needed, and spent his entire weekend on what would have been a two-hour professional job. Sometimes the ‘savings’ aren’t really savings at all.”
Professional repairs typically range from $300-$500 for minor issues, $500-$1,000 for moderate repairs, and $1,000-$3,000 for major work. Full replacements run $5,000-$12,000+ depending on your home’s size and materials chosen.
Hiring the Right Roofer
If you decide to bring in professionals for your asphalt shingle roof repair, here’s how to make sure you’re getting quality work:
Look for a roofer with verified license and insurance – always request actual proof of both liability and workers’ comp coverage. Check local reviews specifically mentioning repair work similar to yours. A company with at least 5 years in business typically indicates stability in our industry.
Always get a detailed written estimate that spells out the scope of work, materials, timeline, warranty information, and cleanup provisions. Ask about manufacturer certifications, as these show specialized training and access to better materials.
At EMC Remodeling, we’ve built our reputation in Temple, Belton, Salado, Killeen, and Harker Heights by providing transparent pricing and ensuring every project gets owner supervision – something many larger companies simply can’t offer.

Red Flags of a Botched Repair
I’ve seen my share of repair jobs gone wrong across Central Texas, and they typically share some common warning signs. Watch for misaligned courses where shingles don’t form straight, even lines. Proper installation should look neat and uniform – like soldiers standing at attention.
Be suspicious if you spot reused or improper nails (look for rust or incorrect sizing), lifted tabs that haven’t sealed properly, or excessive roofing cement visible on the surface. Quality roofers also address ventilation issues during repairs, as proper airflow is crucial to roof longevity in our hot climate.
“Last summer, we were called to a home in Killeen where another contractor had left debris in the gutters and visible nail heads all over the roof,” I tell customers. “Those exposed nails are future leak points just waiting for the next rainstorm. The homeowner ended up paying twice – once for the bad repair and once to have us fix it properly.”
A quality repair should be nearly invisible – blending seamlessly with the existing roof while addressing the underlying issues. When done right, it extends your roof’s life and protects your largest investment – your home.
Maintenance & Life-Extension Hacks
Let’s face it – your roof works hard every day to protect your home. With some regular TLC, you can dramatically extend its lifespan and minimize those asphalt shingle roof repair bills that no homeowner looks forward to.
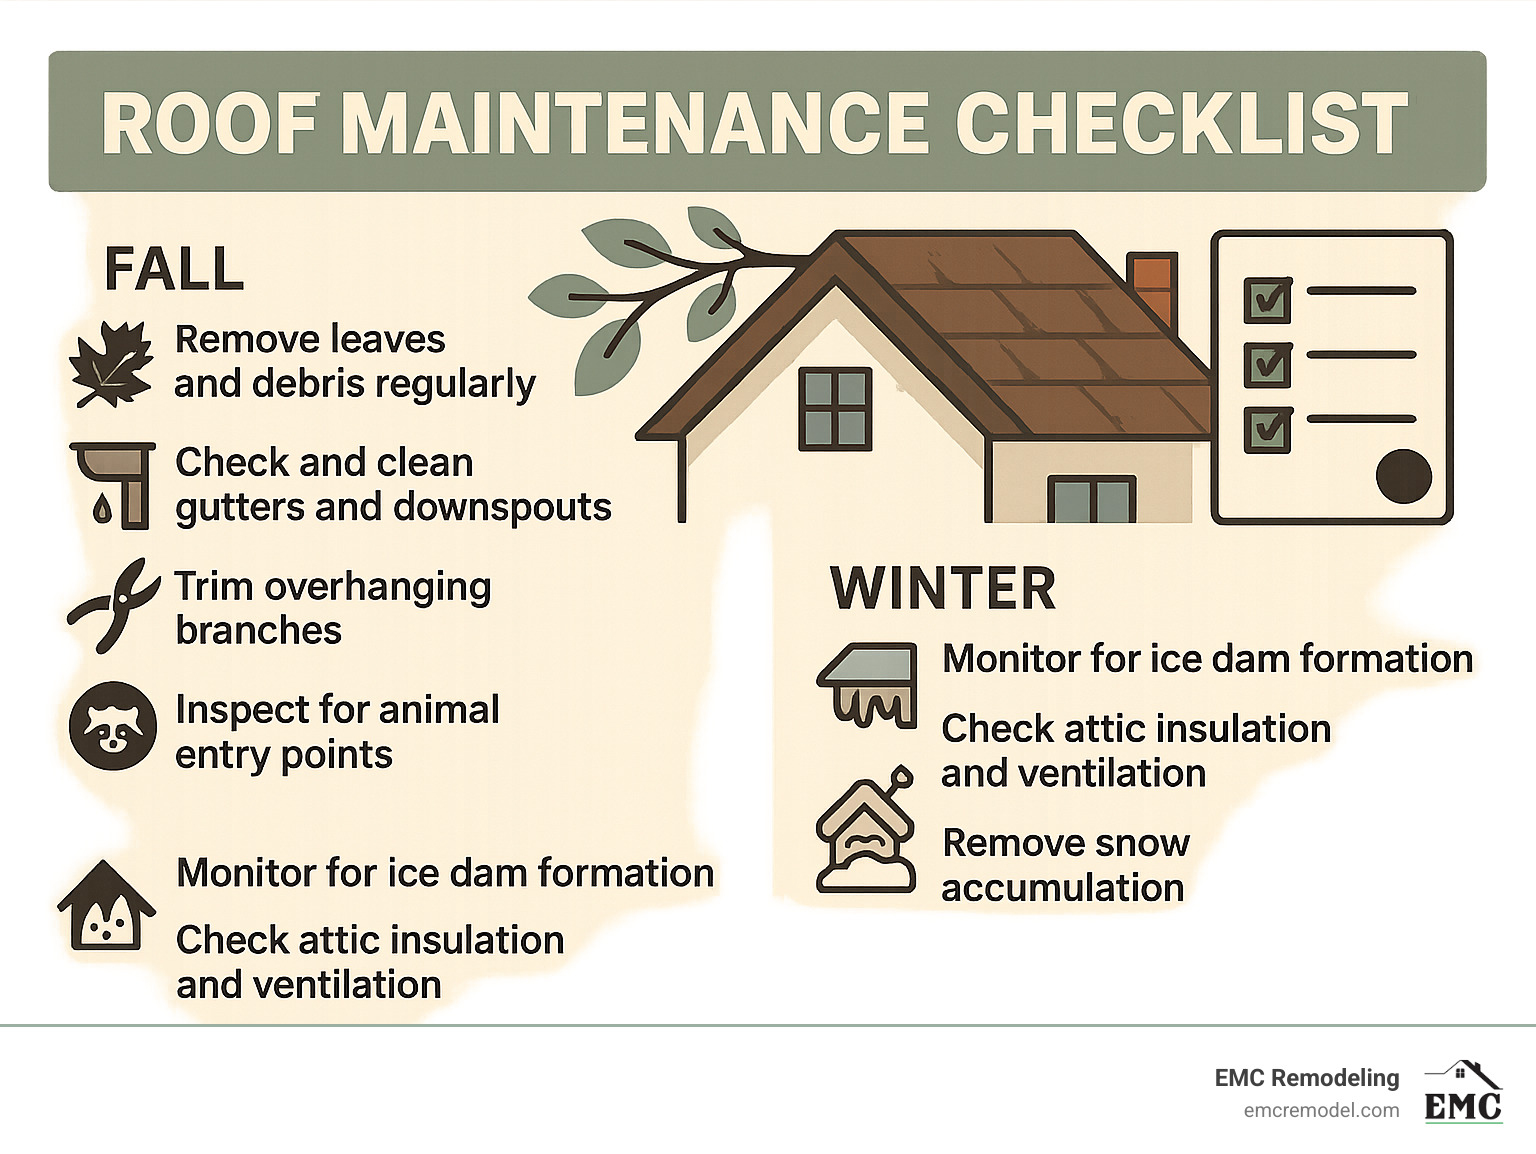
Seasonal Checklist
Here in Central Texas, our roofs face unique challenges throughout the year. We’ve developed a simple maintenance rhythm that keeps our customers’ roofs in top shape:
When spring rolls around, take time to inspect for any hail damage after those notorious Texas thunderstorms. This is also the perfect time to check for winter damage and address it promptly before summer heat makes problems worse. Don’t forget to clear those gutters of spring debris and look for any popped nails that winter’s freeze-thaw cycle might have pushed up.
Summer brings its own challenges. “The Central Texas sun can be brutal on shingles,” we often remind our customers. Take a moment to check for heat-related issues like curling or blistering. Consider applying UV-protective sealants if needed, and ensure your attic ventilation is working properly – poor ventilation can create an oven-like environment that literally bakes your shingles from below.
Fall is perhaps the most critical maintenance season. Remove leaves and debris regularly to prevent moisture traps. Clean those gutters and downspouts thoroughly – this simple task prevents so many winter problems. It’s also the perfect time to trim overhanging branches before winter arrives and to check for any potential animal entry points before critters start looking for warm winter accommodations.
Even though our winters are mild compared to northern states, they still require attention. Monitor for ice dam formation during those rare freezes, check your attic for proper insulation and ventilation, and remove any snow accumulation on the rare occasions we get significant snowfall.
“For Temple and Belton homeowners, we especially emphasize fall maintenance,” we advise. “Preventing leaf buildup in gutters is crucial for avoiding water backup under shingles.”
Do Shingle Restoration Products Work?
You’ve probably seen ads for miracle roof rejuvenation products. But do they actually deliver? Here’s our honest assessment based on years of Central Texas experience:
Products like Roof Maxx (a soy-based oil spray), Vital Coat (a protective coating), and various reflective coatings have shown mixed results in our climate. They work best on roofs in the 10-15 year age range that show signs of drying out but aren’t severely damaged. Think of them as moisturizer for your roof – helpful for addressing age-related drying, but not a cure for deeper problems.
Most applications need to be repeated every 3-5 years and typically cost between $1,000-$2,000 per professional application. While manufacturers claim these treatments can add 5+ years to your roof’s life, we’ve found results vary widely based on roof condition and exposure.
One important caution: some manufacturers may void their shingle warranties if these treatments are applied. Always check your warranty terms before proceeding.
“We’ve seen good results with rejuvenation products on moderately aged roofs in Salado,” we share. “But they’re not a miracle cure for severely damaged or very old roofs.”
Frequently Asked Questions
How many layers of shingles does code allow?
Here in Temple, Belton, and surrounding areas, building codes typically allow a maximum of two layers of asphalt shingles. This isn’t just a local quirk – it’s based on structural engineering concerns. If your roof already has two layers, you’ll need a complete tear-off before installing new shingles. No exceptions on this one, folks – it’s a safety issue.
Can I install new shingles over old ones?
Yes, in many cases you can save some money by installing a new layer over an existing layer – what we call a “recover” or “overlay.” This approach works when your roof deck is in good condition, you currently only have one layer of shingles, the existing shingles are relatively flat (not buckled or severely damaged), and your roof structure can support the additional weight.
While this approach saves on tear-off costs, it does have drawbacks. You won’t get a chance to inspect the underlying deck for damage, and the new shingles might not last as long due to increased heat retention. It’s a trade-off between upfront savings and long-term durability.
When should I choose full replacement over repair?
This is one of the most common questions we hear from homeowners in Killeen and Harker Heights. The 15-year mark is often when we have serious conversations about replacement versus continued repairs. At that point, the economics start to favor replacement.
Consider full replacement when your roof is older than 15-20 years, you’re experiencing multiple leaks in different areas, more than 30% of shingles show damage, the roof deck is compromised, you already have two layers of shingles, or you want to upgrade to impact-resistant or more energy-efficient materials.
A new roof isn’t just an expense – it’s an investment in your home’s value and your family’s protection. For most Central Texas homes, it’s a decision you’ll only need to make a few times during your homeownership.
Conclusion
Asphalt shingle roof repair isn’t just another home maintenance task—it’s your ticket to peace of mind during those unpredictable Central Texas weather events.
Your roof silently protects everything you value, day in and day out. By becoming proactive about roof care, you’re making a smart investment in your home’s future. Think about it: catching and fixing minor issues today can add 5-10 years to your roof’s life. That’s not just protecting your ceiling—it’s protecting your wallet too.
When you spot a damaged shingle or notice some granule loss, it’s easy to think, “I’ll get to that next weekend.” But here in Temple and the surrounding areas, we’ve seen how quickly “minor” issues can become major headaches after one good storm. Acting promptly means avoiding the heartache of interior water damage and saving thousands compared to an unexpected full replacement.
The true value of roof maintenance goes beyond dollars and cents. There’s something deeply satisfying about knowing you’ve done everything possible to protect your family’s home. Whether you’re climbing up there yourself for a simple shingle replacement or calling in our team for more complex repairs, you’re making a choice that future-you will appreciate.
Many of our Killeen and Harker Heights customers tell us the same thing: “I wish I’d called sooner.” That’s because roof issues rarely improve with time—but they almost always become more expensive.
At EMC Remodeling, we’ve built our reputation on honest assessments and quality craftsmanship. We understand Central Texas homes because we live here too. We’ve seen what works and what doesn’t in our unique climate, and we bring that knowledge to every roof we touch.
Need a second opinion on your roof’s condition? We’re just a phone call away, offering free roof inspections and 24/7 emergency response when you need us most.

Your roof doesn’t have to be perfect—it just needs to be properly maintained. Those twice-yearly inspections, especially after severe weather, can make all the difference. A small investment of time today prevents big expenses tomorrow.
So grab those binoculars, scan your roof line, and give your home’s first line of defense the attention it deserves. Your future self (and your savings account) will thank you.